Follow Me On Social Media!
Red, White, and Blue Cake Balls

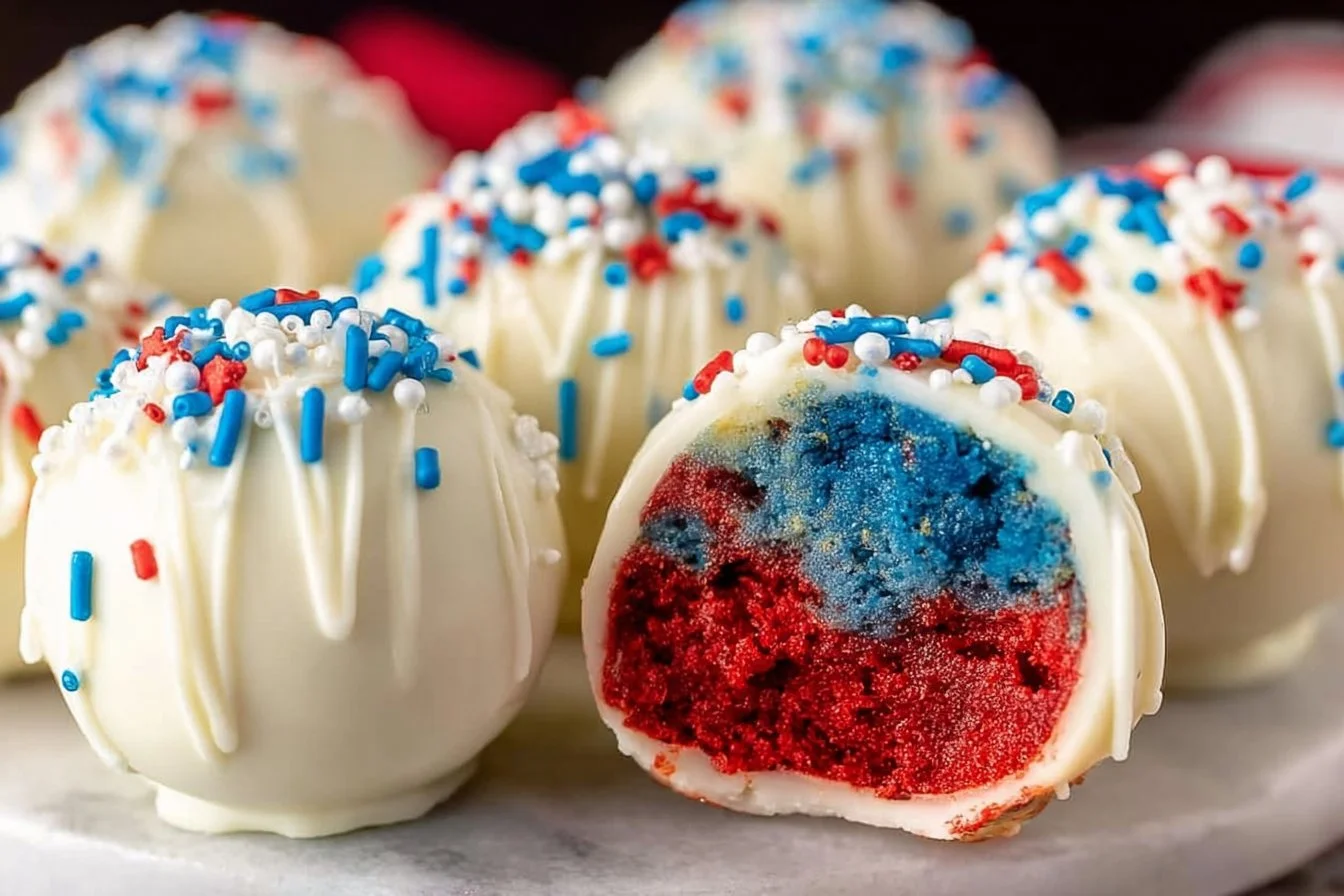
Delight in a Festive Treat: Red, White, and Blue Cake Balls
Celebrate your next occasion with these playful and visually stunning Red, White, and Blue Cake Balls. Perfect for holidays like the Fourth of July or Memorial Day, these delightful bites blend color, flavor, and fun into a small but mighty dessert. With the harmonious mix of cream cheese and cake, they are sure to tantalize your taste buds and be a hit among guests of all ages. Easy to make and full of festive spirit, these cake balls leave a lasting impression.
This recipe combines the classic flavor of white cake with vibrant colors, making it not only delicious but also a feast for the eyes. The smooth coating of white melting chocolate and vibrant sprinkles gives these cake balls an irresistible charm that will have everyone reaching for seconds! Plus, they are incredibly fun to make, especially if you’re involving kids or friends for a baking session.
Why You Should Whip Up This Recipe
There are countless reasons to embrace these Red, White, and Blue Cake Balls in your baking repertoire. First, they are endlessly customizable and can be adapted or decorated to suit any festive occasion. The colorful layers provide a burst of excitement, creating a beautiful presentation that makes any dessert table pop. Whether it’s a birthday, holiday, or simply an occasion to indulge, these cake balls play a perfect part.
Moreover, making cake balls can be a bonding activity with family or friends. The process is interactive, allowing everyone to get hands-on by rolling the cake into balls and decorating them. This aspect can create delightful memories while ensuring that the end product is both delightful and delicious. They also store well, leaving you with treats ready for spontaneous gatherings or late-night cravings.
Understanding the Cooking Process
The process of making Red, White, and Blue Cake Balls is straightforward yet requires patience at certain stages to achieve the perfect end result. Begin with baking the individual layers of cake in vibrant colors, then crumble and combine them with cream cheese for binding. The final steps involve dipping the formed balls in melted chocolate before embellishing them with colorful sprinkles, ensuring each ball is a unique creation.
Additionally, chilling the cake balls is a crucial step, as it helps them hold their shape while being dipped in chocolate. This technique is essential to prevent any mess or undesired melting during the coating process. Following these steps will ensure that your cake balls are not only tasty but also look professionally made.
Preparing for Your Cake Ball Adventure
Before diving into this delicious project, it’s beneficial to gather all your ingredients and tools to streamline the cooking process. Measure out your ingredients, and consider prepping your workspace to make the experience enjoyable and efficient.
Having everything at your fingertips not only speeds up your baking but also minimizes the chances of forgetting an ingredient. Creating a clean, organized workspace will also help maintain focus and make the process feel rewarding, ensuring that every stage of baking flows seamlessly into the next. Gather any special equipment you’ll need, such as mixing bowls, baking pans, and a microwave-safe bowl for melting chocolate.
Ingredients You’ll Need
- 1 (15.25 ounce) white cake mix, plus ingredients on box needed to make it
- Red and blue food coloring
- 1 (8 ounce) block cream cheese, softened to room temperature
- 1 (10 ounce) package white melting chocolate
- Red, white, and blue sprinkles

Notes on Ingredients and Possible Substitutions
When preparing these cake balls, there are a few substances to keep in mind. While the recipe calls for a white cake mix, feel free to experiment with different flavor cake mixes. Lemon or vanilla would bring a delightful twist. If cream cheese isn’t available, you could use a store-bought frosting, though the texture will be slightly different.
The color of the cake is completely up to your preference; you can play around with shades of colors to celebrate different occasions or themes. For example, pastel colors or neon shades can create an entirely different aesthetic. Just ensure that any food coloring used is of high quality to maintain vibrant results.
Step-by-Step Instructions for Making Cake Balls
Preheat oven to 350F or at the temperature according to package instructions. Lightly grease 3 small baking pans (I used 8×8) and set aside.
In a large mixing bowl, combine the cake mix along with the ingredients needed on the box until well mixed.
Separate the batter into three smaller bowls. Leave one bowl plain and set it aside. Mix red food coloring in the second bowl and blue food coloring in the third bowl, adding 5 drops at a time and mixing until the desired shade is reached.
Pour each batter into the prepared baking pans and bake for 14-16 minutes, or until a toothpick inserted in the center comes out clean.
Remove the pans from the oven and cool completely on a wire rack.
Once cooled, crumble the cake into smaller pieces and transfer to separate bowls; set aside.
In a separate mixing bowl using a hand mixer on medium high speed, beat the cream cheese until smooth and creamy.
Divide the cream cheese evenly into 3 crumbled cake bowls. Mix each bowl together until fully incorporated. The easiest way is with an electric mixer but you can do it by hand. If you use an electric mixer, make sure to wash it between each color.
Line two baking trays with parchment paper.
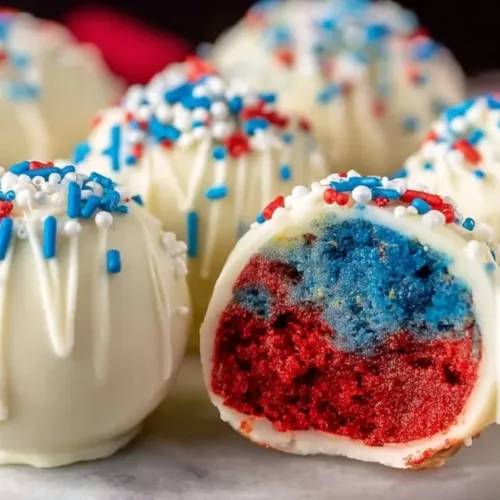
Break off small one-inch chunks from each of the 3 cakes and then roll the colors together with your hands to make a ball. Place each ball onto the prepared baking trays.
Once all of the cake balls have been made, place the trays in the refrigerator and allow to chill for 1-2 hours. This will ensure they hold their shape and stay firm while dipping.
Place chocolate in a microwave-safe bowl and microwave in 30-second increments, stirring after each one, until melted and smooth.
Place one cake ball at a time on a fork and dip it into the melted chocolate. Tap the fork to remove the excess. Place the ball back onto the baking tray. Repeat with the rest of the cake balls.
Pour the leftover melts into a piping bag (or a Ziploc bag with a corner snipped off). Drizzle it over the balls one at a time and then immediately top each ball with sprinkles.
Return the cake balls to the refrigerator to chill for another 15 minutes to allow the coating to finish setting.
Keep refrigerated until ready to serve.
Tips for Perfect Cake Balls
To enhance your cake ball-making experience, consider several tips that can lead to exceptional results. First, ensure that your cream cheese is at room temperature, as this will make mixing easier and create a smoother consistency.
For optimal flavor, avoid overmixing the cake batter, as this can lead to a denser cake. Another key factor is the temperature of your kitchen; in a warmer environment, the chocolate coating might melt too quickly. If needed, work in smaller batches to keep the chocolate manageable.
Suggestions for Serving Your Cake Balls
These cake balls are wonderfully versatile and can be served in various ways. For a festive serving option, arrange them on a decorative platter and garnish with fresh fruits or vibrant flowers for added visual appeal. They are perfect for dessert tables, picnics, or as delightful gifts in decorative packaging.
Consider pairing your cake balls with an array of dipping sauces, like caramel or berry coulis, for an extra flavor dimension. They can also be served alongside beverages such as fruit punch, lemonade, or cocktails to complement the sweetness of the cake balls.
Storing and Reheating Cake Balls
To maintain the freshness of your cake balls, they should be stored in an airtight container in the refrigerator. This will help them retain their shape and flavor for up to two weeks. If you plan to store them for longer, you can freeze them after the initial chilling step. Just place them in a single layer on a baking tray to freeze before transferring to a freezer-safe container.
When ready to enjoy, simply remove them from the freezer and let them thaw in the refrigerator before serving. If reheating is necessary, avoid using the microwave as it can make the chocolate coating lose its crispness.
Essential Kitchen Tips for Success
Having the right tools can make a difference in your baking process. Using high-quality mixing bowls, an electric mixer, and good-quality parchment paper will ease your cooking experience. A reliable microwave for melting chocolate is also essential to avoid burning.
Also, be mindful of cleanliness and organization. Keeping a tidy workspace allows for a pleasurable cooking environment and less chance of cross-contamination. Additionally, using temperature-controlled settings for certain steps, such as chilling the cake balls before dipping, will yield better results.
Creative Variations on the Cake Ball
While the classic Red, White, and Blue Cake Balls are perfect for many occasions, don’t hesitate to experiment with flavors and colors to match your events. You might try adding different extracts like almond or vanilla to the cake mix for added depth.
Consider stuffing your cake balls with fillings such as fruit preserves or chocolate for an exciting surprise and added flavor. Changing the exterior by using dark or milk chocolate will also provide a different taste experience, adding variety to your sweet creations.
Nutritional Insights
While these cake balls are a delightful treat, moderation is key. Each cake ball is rich in sugar and fat, which is typical for sweet snacks. However, they offer fun and satisfaction and can be part of an overall balanced diet when enjoyed in moderation.
Each cake ball provides a mix of carbohydrates from the cake, dairy from the cream cheese, and fat from the chocolate coating. Consider pairing them with fruit for additional fiber and vitamins on your dessert plate.
Common Queries About the Recipe
How can I make vegan cake balls?
To make these cake balls vegan, substitute traditional cake mix with a vegan cake mix and replace the cream cheese with a dairy-free cream cheese alternative.
Can I use a different type of chocolate for coating?
Absolutely! While white chocolate is traditional for these cake balls, you can use milk or dark chocolate based on your preference. Just be sure to adjust your melting technique as needed since different chocolates have different melting points.
What can I do if my cake balls are falling apart?
If your cake balls are too crumbly, they likely need more binding. Mixing in a bit more cream cheese or placing them in the refrigerator for a while longer can help them firm up.
Final Thoughts on This Colorful Delight
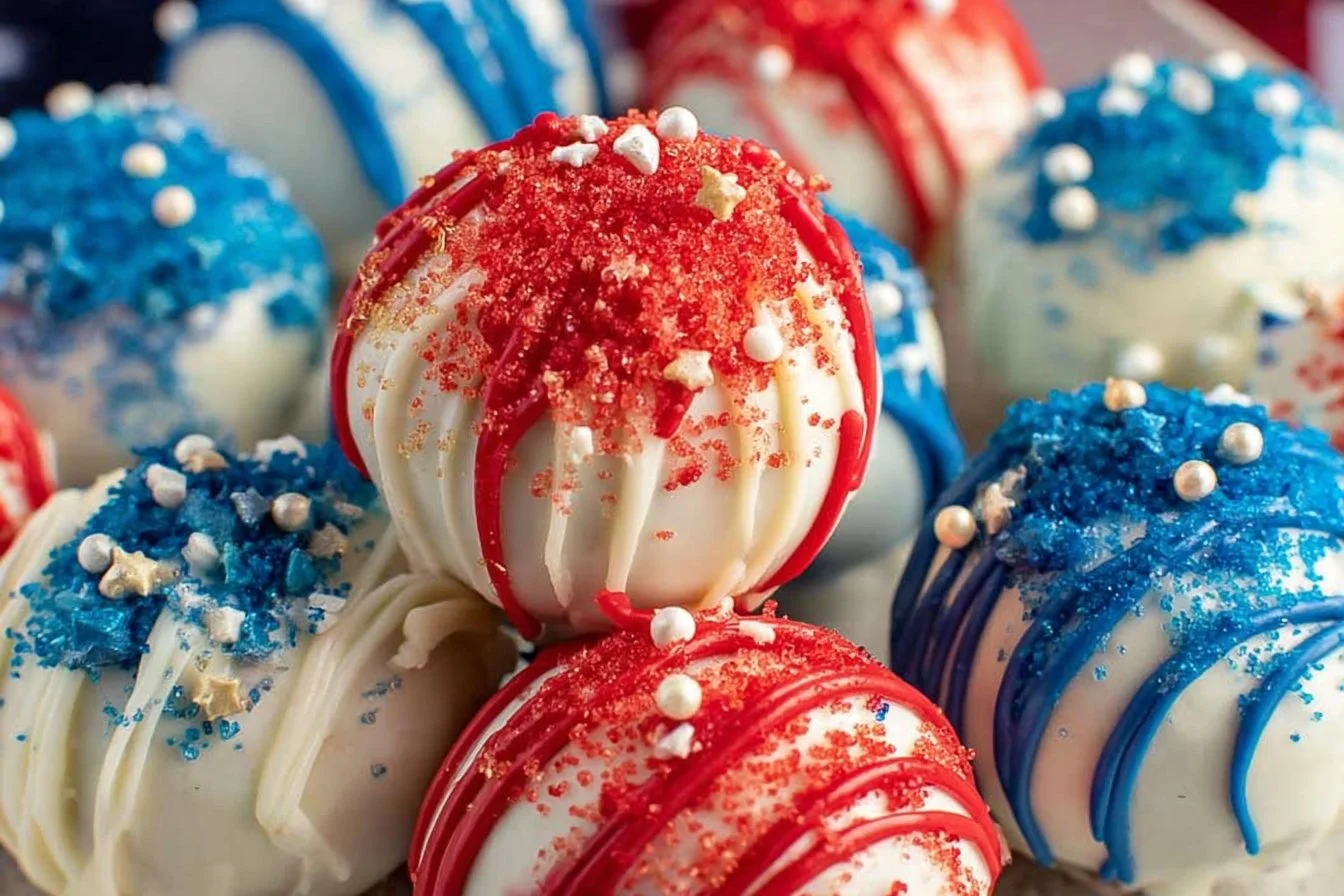
Creating Red, White, and Blue Cake Balls is not just about baking; it’s about making memories. With their vibrant colors and delightful flavors, these cake balls capture the spirit of celebration and joy. They are the perfect addition to any gathering or festivity, and each bite brings a delightful explosion of flavor.
So gather your ingredients, invite some friends over, and let your creativity flow. Whether you stick to the classic recipe or venture into your unique variations, these cake balls are sure to steal the spotlight. Enjoy the process, and most importantly, enjoy every bite!
Red, White, and Blue Cake Balls
Delightful and visually stunning cake balls perfect for holidays, combining white cake, cream cheese, and colorful decorations for a fun treat.
Ingredients
For the Cake
- 1 box 15.25 ounce white cake mix, plus ingredients needed to make it Feel free to use different flavor cake mixes.
- 5 drops Red food coloring Adjust quantity for desired shade.
- 5 drops Blue food coloring Adjust quantity for desired shade.
For the Filling and Coating
- 1 block 8 ounce cream cheese, softened to room temperature Can be substituted with store-bought frosting.
- 1 package 10 ounce white melting chocolate Use milk or dark chocolate as an alternative if desired.
- 1 cup Red, white, and blue sprinkles For decoration on top of cake balls.
Instructions
Baking the Cake
- Preheat oven to 350°F or according to package instructions. Lightly grease 3 small baking pans (8x8 inches) and set aside.
- In a large mixing bowl, combine the cake mix along with the necessary ingredients from the box until well mixed.
- Divide the batter into three smaller bowls; leave one bowl plain. Mix red food coloring into the second bowl and blue food coloring into the third bowl.
- Pour each batter into the prepared baking pans and bake for 14-16 minutes or until a toothpick inserted comes out clean.
- Remove the pans, allow to cool completely on a wire rack.
Preparing the Cake Balls
- Crumble the cooled cake into smaller pieces and transfer to separate bowls.
- In a separate mixing bowl, beat the cream cheese until smooth and creamy.
- Divide the cream cheese evenly among the crumbled cake bowls and mix each until fully incorporated.
- Line two baking trays with parchment paper. Roll small one-inch chunks of each colored cake together with your hands to form balls and place on the trays.
- Refrigerate the cake balls for 1-2 hours to allow them to firm up.
Coating the Cake Balls
- Melt the chocolate in a microwave-safe bowl in 30-second increments, stirring until smooth.
- Dip each cake ball into the melted chocolate using a fork and tap to remove excess. Place back on the baking tray.
- Drizzle any leftover chocolate over the balls and immediately top with sprinkles.
- Return the cake balls to the refrigerator for another 15 minutes to set the coating.
Notes
These cake balls can be made with various cake mixes and fillings. Store in an airtight container in the refrigerator for up to two weeks.